Building on our ReactJS and WAX smart contract interaction guide, this article advances our application’s development. We’ll delve into the intricacies of blends and workspace upgrades, alongside the necessary tools. Additionally, guidance will be provided on interface actions in sync with our smart contract, enhancing the application’s functionality and user experience.
Blending assets
Blends in smart contracts allow collection owners to create new, improved assets by combining existing ones. Imagine upgrading your tools by blending two of the same type, resulting in a tool that extracts significantly more resources.
This process enriches the user experience by adding depth to resource management and gameplay strategy, seamlessly integrated into the UI for easy user interaction.
This is what it looks like.
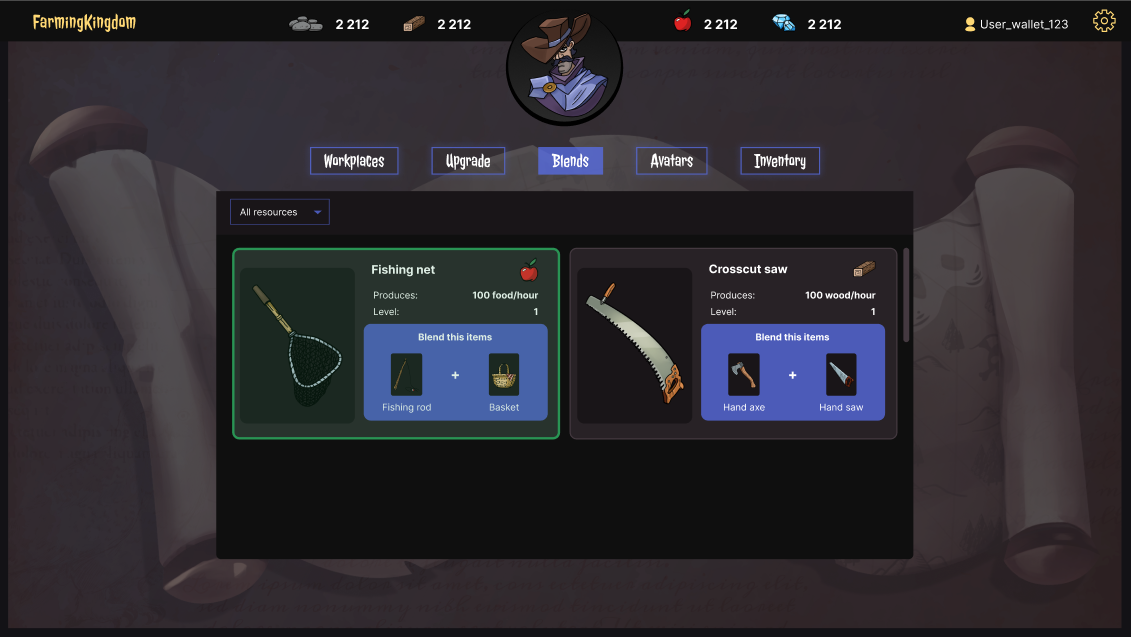
The smart contract features predefined blend recipes that users can utilize through the `fetchBlends` function. This functionality enables the extraction of various mix recipes from the contract, allowing users to create enhanced tools and assets by following specific blend instructions directly within the application’s interface.
export const fetchBlends = async () => {
    const { rows } = await fetchRows({
        contract: 'dappgamemine’,
        scope: 'dappgamemine’,
        table: "blendrecipes"
    });


    const templateOneRequests = rows.map(row => axios.get(`https://test.wax.api.atomicassets.io/atomicassets/v1/templates?collection_name=minersgamers&template_id=${row.blend_components}`));


    const responsesOne = await Promise.all(templateOneRequests);


    const templateTwoRequests = rows.map(row => axios.get(`https://test.wax.api.atomicassets.io/atomicassets/v1/templates?collection_name=minersgamers&template_id=${row.resulting_item}`));


    const responsesTwo = await Promise.all(templateTwoRequests);


    const updatedRows = rows.map((row, index) => {
      const { data:dataOne } = responsesOne[index];
      const { data:dataTwo } = responsesTwo[index];
      return { ...row, blend_components: dataOne.data, resulting_item: dataTwo.data[0] };
    })


    return updatedRows;
}- Inside the function, it first fetches rows of data from a specified table (blendrecipes) using the fetchRows function.
- Once the rows have been fetched, the function proceeds to create an array of requests to fetch data from an API using Axios. It iterates over each row and constructs a URL to fetch data relating to the blend components and resulting elements.
- These requests are then made concurrently using Promise.all, which waits for all requests to be resolved.
- The responses from these queries are stored in two separate arrays (responsesOne and responsesTwo).
- Having obtained the responses for the blend components and resulting elements, the function maps over the original rows again.
- Within the map function, it extracts the relevant data (dataOne and dataTwo) from the corresponding responses.
- Finally, it creates updated rows by merging the original row data with the retrieved blend component and resultant item data.
We have also implemented a function that checks whether the user can make a blend with the available inventory according to one of the recipes. We check this using the following function:
const blendComponentsMatch = userToolAsset.some(asset => asset.template.template_id === item.blend_components[0].template_id || asset.template.template_id === item.blend_components[1].template_id);


const isAvailable = blendComponentsMatch &&
userToolAsset.some(asset => Number(asset.template.template_id) !== Number(item.blend_components[0].template_id) && Number(asset.template.template_id) !== Number(item.blend_components[1].template_id));- userToolAsset – array of user tools;
- item – each element of the array containing the recipes;
If the function isAvailable is true, the user can make a blend; if false, the user does not have enough tools for a particular recipe.
Now let’s look at how the UI interacts with the smart contract to create a blend.
export const blend = async ({ activeUser, componentIds, assets, blendId }) =>   {
  return await signTransaction({
      activeUser,
      account: ’atomicassets’,
      action: 'transfer',
      data: {
          from: activeUser.accountName,
          to: 'dappgamemine’,
          assets_ids: assets,
	    memo: `blend:${blendId}`
      }
  });
};
For a successful blend of our tools, let’s look at the configurations we need to pass to our function:
- owner – this is our nickname of the user who connected his wallet, we take it from activeUser.accountName;
- component_ids – this is array of our tool assets for blend;
- blend_id – this is id of blend
Here is a link to the action in the smart contract for blend tools:
https://testnet.waxblock.io/account/atomicassets?action=transfer#contract-actions
Upgrading assets
The next thing we’re going to look at is upgrading our tools and workplaces.
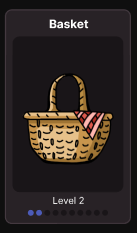
Our tool starts at level 1, but we can upgrade it. When this tool is staking on the workplace, it calculates the amount of resources needed to upgrade it and, if the user has enough, increases the item’s mining_rate. Which, as we know from the previous article, affects how fast our resources are mined.
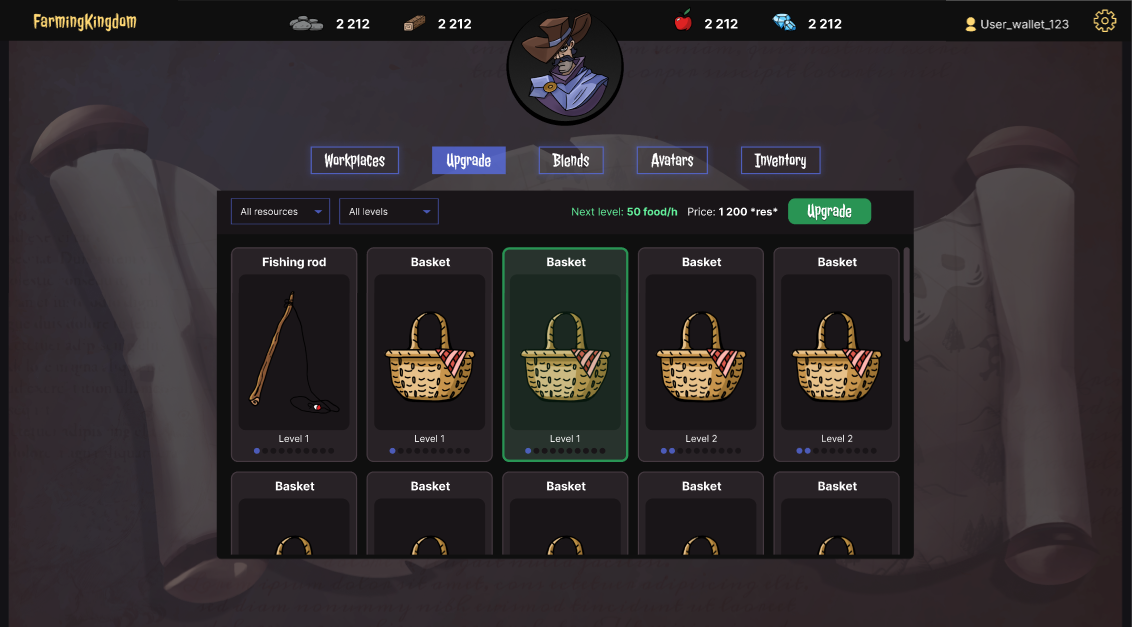
First, we need to decide which tool or workplace we want to improve. In order to perform this action, our tool needs to be staked. Then we pass it to the configuration of our action.
The UI should look at the maximum allowed level of the tool we want to upgrade before calling the action. It is written in the data of this tool.
The next level should be higher than the current one. For our example, let’s assume that our instrument has an initial first level.
Action for upgrade tool:
At the beginning of the function, we use a check to see if our tool has reached the maximum level.
export const upgradeTool = async ({ activeUser, toolID, wpID }) => {
  const maxLevel = toolID.data.maxLevel;
  const currentLevel = toolID.data.level;


  const nextLvl = currentLevel + 1;


  if (nextLvl > maxLevel) {
    throw new Error('Error: The next level exceeds the maximum level of the instrument.');
  }


  return await signTransaction({
    activeUser,
    account: 'dappgamemine’,
    action: 'upgradeitem',
    data: {
      owner: activeUser.accountName,
      item_to_upgrade: toolID.asset_id,
      next_level: nextLvl,
      staked_at_farmingitem: wpID
    }
  });
};
Here we use an action game called “upgradeitem”.
- owner – this is our nickname of the user who connected his wallet, we take it from activeUser.accountName;
- item_to-upgrade – ID of the tool we want to upgrade;
- stake_at_farmingitem – the ID of the workplace to which the tool is staking;
After a successful upgrade, our tool becomes level 2:
Action for workplace tool:
export const upgradeWorkplace = async ({ activeUser, wpID, stakedBool}) => {
  return await signTransaction({
      activeUser,
      account: 'dappgamemine’,
      action: 'upgfarmitem',
      data: {
          owner: activeUser.accountName,
          farmingitem_to_upgrade: wpID,
          staked: stakedBool,
      }
  });
};
Here we use an action game called “upgfarmitem”.
- owner – this is our nickname of the user who connected his wallet, we take it from activeUser.accountName;
- farmingitem_to_upgrade – ID of the workplace we want to upgrade;
- staked (boolean) – If it is staking, then true, if not, then false.
Here is a link to the action in the smart contract for upgrade tools:
https://testnet.waxblock.io/account/dappgamemine?action=upgradeitem#contract-actions
and upgrade workplaces
https://testnet.waxblock.io/account/dappgamemine?action=upgfarmitem#contract-actions
Avatars
Let’s take a look at what avatar is and what they’re for.
Avatars are characters that have extra attributes. You can also put items on them that enhance those traits.
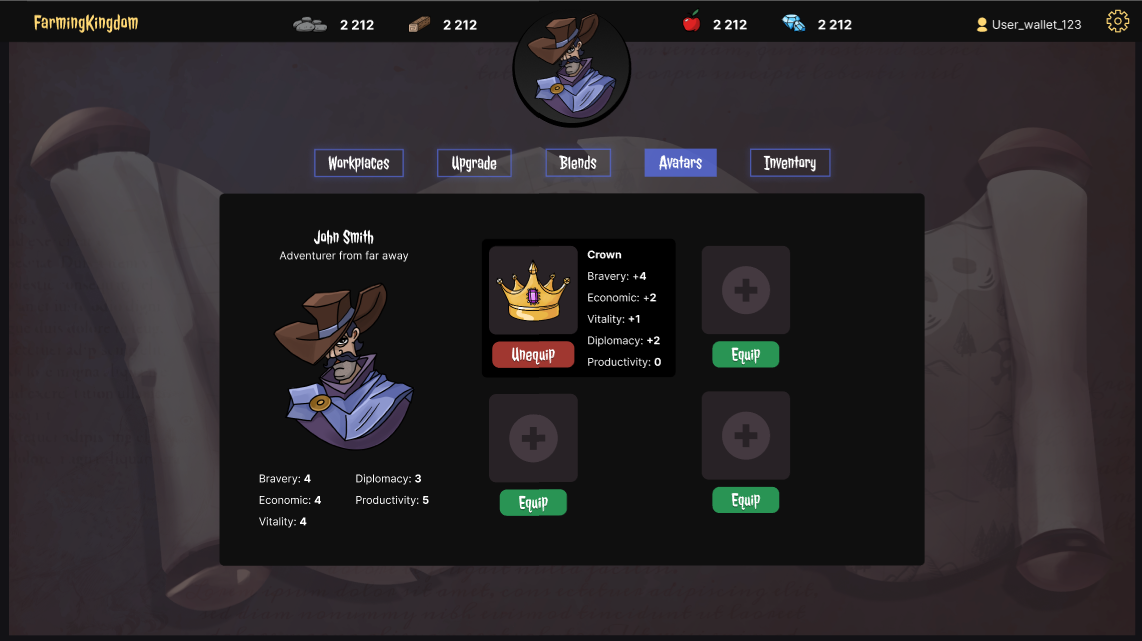
This action allows you to set the selected avatar as active and return the old one to our inventory.
Function for set avatar:
export const setAvatar = async ({ activeUser, avatarId }) => {
  return await signTransaction({
      activeUser,
      account: 'atomicassets',
      action: 'transfer',
      data: {
        from: activeUser.accountName,
        to: 'dappgamemine’,
        asset_ids: avatarId,
        memo: 'set avatar'
      }
  });
};
For this action, we use the following configurations:
- from – this is our nickname of the user who connected his wallet, we take it from activeUser.accountName;
- to – game contract name
- asset_ids – array of avatars
- memo – “set avatar” – to set your avatar’s
Function for set equipment:
export const setEquipment = async ({ activeUser, equipments }) => {
  return await signTransaction({
      activeUser,
      account: 'atomicassets',
      action: 'transfer',
      data: {
          from: activeUser.accountName,
          to: 'dappgamemine’,
          asset_ids: equipments,
          memo: 'set equipment'
      }
  });
};
The configurations are the same as in the previous action, only the memo changes.
- asset_ids – array of equipments
- memo – “set equipment” – to set your avatar’s equipment
Here is a link to the action in the smart contract for set avatar and equipment:
https://testnet.waxblock.io/account/atomicassets?action=transfer#contract-actions
We also have avatars table, where for each user there is an array with id that contains their avatar and equipment. For this we will use a read from the table. In the last article we looked at the fetchRows function.
export const fetchAvatars = async ({ activeUser }) => {
    const { rows } = await fetchRows({
        contract: 'dappgamemine’,
        scope: activeUser.accountName,
        table: "avatars"
    });

    return rows;
  }
The stats table, which contains the current characteristics of the user (the sum of the equip and avatar stats).
export const fetchStats = async ({ activeUser }) => {
  const { rows } = await fetchRows({
      contract: 'dappgamemine’,
      scope: activeUser.accountName,
      table: "stats"
  });

  return rows;
}
Here is a link to the action in the smart contract for watch avatars:
and stats:
PS. The Following link leads us to a repository that corresponds everything described, so you can simply build that code and use in a way you want.